Transfer Your Phone Photos to a Laptop Without the Hassle
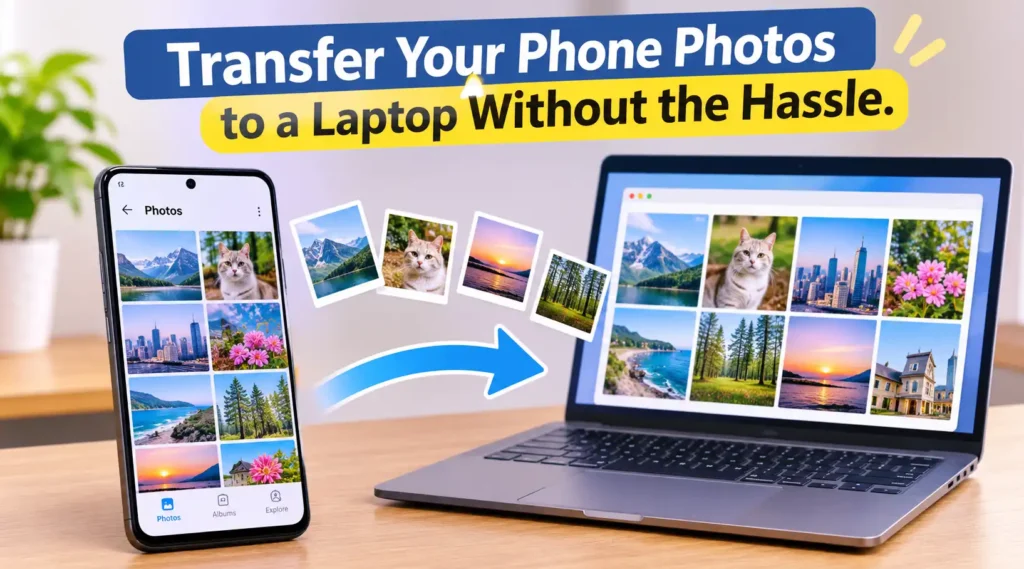
Phone photos transfer to laptop illustration for easy and hassle free file sharing.
Our smartphones have become the primary cameras we carry everywhere. Whether you’re capturing family moments, taking pictures during vacations, saving screenshots, or documenting everyday activities, it’s surprisingly easy to accumulate hundreds or even thousands of photos. The problem starts when your phone storage gets crowded, making it harder to install apps, record videos, or capture new memories.
Moving your photos to a laptop is one of the easiest ways to free up storage while keeping your memories accessible. However, not everyone knows the best way to do it. Some people prefer using a USB cable, while others rely on wireless transfers, cloud storage, or dedicated applications. Each method has its own advantages, depending on your devices and internet connection.
The good news? You don’t need advanced technical skills or expensive software to transfer pictures from your phone to a laptop. Whether you’re using an Android phone, an iPhone, a Windows laptop, or a MacBook, there are several straightforward options worth trying.
In this guide, we’ll explore practical ways to transfer your phone photos to a laptop without unnecessary complications. You’ll also learn how different transfer methods work, which option is most convenient, and how to keep your pictures organized and safe after moving them.
What Does Transferring Photos from a Phone to a Laptop Mean?
Transferring photos from a phone to a laptop simply means copying or moving image files from your smartphone’s internal storage to your computer. These files can include regular camera pictures, screenshots, downloaded images, edited photos, and even images received through messaging applications.
Depending on the method you choose, the transfer can happen through a USB cable, wireless connection, cloud service, or file-sharing application. Some methods create an additional copy of your pictures, while others synchronize files between devices. Understanding this difference is important because copying photos is generally safer when you want to preserve the originals on your phone.
Why Should You Transfer Photos from Your Phone to a Laptop?
One major reason is storage management. High-resolution photos and videos can consume several gigabytes of space, especially if your phone has been collecting memories for years. Moving older pictures to a laptop gives your smartphone more breathing room without forcing you to delete everything you want to keep.
Another benefit is easier photo management. A laptop provides a larger screen, more storage flexibility, and convenient tools for organizing, editing, and backing up images. You can sort pictures into folders, rename files, create albums, or prepare them for printing. Think of your laptop as a personal photo library where your favorite memories can stay organized and accessible.
Easy Ways to Transfer Phone Photos to a Laptop Without Hassle
Transferring photos from your phone to a laptop doesn’t have to involve complicated software or confusing settings. Whether you want to move a few favorite pictures or back up your entire photo collection, choosing the right method can make the process much easier. The best approach usually depends on your phone’s operating system, the laptop you’re using, and whether you prefer a wired or wireless connection.
Before getting started, it’s worth knowing that some transfer methods are faster and more reliable than others. A USB cable is often ideal for moving large collections, while wireless options are more convenient when you only need to send a handful of pictures. Let’s explore the most practical ways to transfer your photos so you can choose the one that fits your everyday needs.
How to Transfer Photos from an Android Phone to a Laptop Using USB
Using a USB cable is one of the simplest ways to transfer photos from an Android phone to a Windows laptop. You don’t need an internet connection, additional subscriptions, or complicated applications. Most Android phones already support file transfers through their USB connection, making this method convenient for everyday use.
Start by connecting your Android phone to your laptop using a compatible USB cable. Unlock your phone and check the notification panel for a USB connection notification. Tap it, then select File Transfer or Transferring Files instead of the default charging option. Your laptop should recognize the phone as an external storage device, allowing you to access its folders through File Explorer.
Locate Your Photos in Internal Storage
Once your phone appears in File Explorer, open its internal storage and look for the **DCIM** folder. Inside, you’ll usually find a **Camera** folder containing pictures taken with your phone’s camera. Depending on your device and applications, other images may be stored in folders such as Pictures, Screenshots, or Download.
Copy Photos to Your Laptop
Select the pictures you want to transfer, right-click, and choose Copy. Open your preferred destination folder on the laptop, then right-click and select Paste. If you’re transferring hundreds of photos, it’s better to copy them in smaller batches to avoid interruptions. Keep the original files on your phone until you’ve confirmed that the transferred pictures open correctly on your laptop.
How to Transfer Android Photos to a MacBook
Android phones and MacBooks don’t always communicate as directly as Android devices and Windows laptops. Unlike Windows, macOS doesn’t normally provide built-in browsing for Android phone storage through Finder. However, you can still transfer pictures using compatible file-transfer applications or wireless sharing methods.
One practical option is to use an Android-compatible file transfer application that allows your MacBook to access your phone’s storage. Connect your Android device using a USB cable, unlock the phone, and select the File Transfer USB mode if prompted. Follow the application’s instructions to browse your phone’s folders and copy the pictures you need. Make sure the application supports your current macOS and Android versions before installing it.
Use Wireless Transfer When USB Is Inconvenient
If you don’t want to install additional software, wireless file-sharing tools can be a convenient alternative. Depending on your devices, you can use a browser-based transfer service or a compatible sharing application to send photos over the same Wi-Fi network. This is particularly useful when you only need to move a few pictures rather than an entire photo library.
Keep in mind that wireless transfers can be slower when your network connection is unstable. For large photo collections, a wired connection or another reliable transfer method may save you considerable time.
How to Transfer Photos from an iPhone to a Windows Laptop
Transferring photos from an iPhone to a Windows laptop is relatively straightforward, even if you’re not familiar with Apple’s ecosystem. Unlike Android phones, iPhones use Apple’s photo management system, but Windows still provides built-in tools that make importing pictures relatively easy. You can use a USB cable to move your photos directly without relying on an internet connection.
Start by connecting your iPhone to your Windows laptop using a compatible USB cable. Unlock your iPhone and tap Trust This Computer if the permission prompt appears. You may also need to enter your passcode to authorize the connection. Once Windows recognizes your device, open the Photos application, select the import option, and choose your connected iPhone as the source. Select the pictures you want to transfer and follow the instructions to save them to your laptop.
Import Photos Using Windows Photos App
The Windows Photos app provides a convenient way to import pictures without manually searching through every folder. After connecting your iPhone, open Photos, select **Import**, and choose your iPhone from the available devices. Windows will scan for available pictures and videos, allowing you to select the files you want to copy.
You can also choose where imported pictures should be saved, making it easier to keep your photo collection organized. Once the import process finishes, open the destination folder and check whether your pictures are accessible. Don’t disconnect your iPhone while the transfer is still running, especially when importing a large collection.
Transfer Photos Through File Explorer
Another option is using File Explorer to access your iPhone’s photo storage. After connecting and trusting the computer, open File Explorer and look for your iPhone under This PC. Navigate through its internal storage until you find the DCIM folder, where camera pictures are generally stored.
You can then select individual pictures or multiple files and copy them to a folder on your laptop. This method is useful if you prefer managing files manually rather than importing everything through the Photos app. However, the available folders and file access may vary depending on your iOS version and device settings.
How to Transfer Photos from an iPhone to a MacBook
If you’re using an iPhone and a MacBook together, transferring photos is generally easier because both devices are part of Apple’s ecosystem. You can use the built-in Photos application, AirDrop, or iCloud Photos to access your pictures without installing unnecessary third-party applications. Each option offers a different level of convenience depending on how many images you want to transfer.
For a direct USB transfer, connect your iPhone to your MacBook using a compatible cable. Unlock your phone and approve the connection if macOS asks you to trust the device. Open the Photos app on your MacBook, select your iPhone under the Devices section, and wait for the available pictures to appear. Choose the images you want, then click Import Selected or Import All New Photos to save them to your Mac’s photo library.
Use the Image Capture App on macOS
Image Capture is another useful built-in macOS application for importing photos from an iPhone. Unlike the Photos app, it allows you to select a specific destination folder rather than automatically adding everything to your photo library.
Connect your iPhone, open Image Capture on your MacBook, and select your device from the sidebar. Once the available images appear, choose the pictures you want to transfer and select a destination folder. Click Download to copy the selected files. This option is particularly handy if you prefer keeping your photos in regular folders instead of managing everything through the Photos application.
Transfer Photos Using AirDrop
If you only need to transfer a few pictures, AirDrop is probably one of the most convenient options. Make sure Wi-Fi and Bluetooth are enabled on both your iPhone and MacBook. Open the Photos app on your iPhone, select the pictures you want to share, tap the Share button, and choose your MacBook from the AirDrop section.
Accept the incoming transfer on your MacBook if prompted. The received pictures will generally appear in the Downloads folder, where you can move them wherever you want. AirDrop is especially useful for quickly sending selected images without connecting a cable or uploading anything to cloud storage.
How to Transfer Phone Photos to a Laptop Wirelessly
Not everyone wants to deal with USB cables every time they need to transfer pictures. Maybe your charging cable is too short, your laptop is across the room, or you simply prefer a cleaner setup. Fortunately, wireless transfer methods make it possible to move photos from your phone to a laptop without physically connecting the two devices.
Most wireless methods use Wi-Fi, Bluetooth, or dedicated file-sharing applications. However, their speed and compatibility can vary significantly. Wi-Fi-based transfers are generally better for larger files, while Bluetooth is more suitable for occasional transfers of smaller files. The following options can help you move pictures without constantly plugging and unplugging your phone.
Transfer Photos Using Bluetooth
Bluetooth is one of the oldest wireless file-sharing technologies, but it can still be useful for transferring a small number of pictures. Most Android phones and Windows laptops support Bluetooth file sharing, so you may not need to install anything extra.
First, enable Bluetooth on both devices and pair your Android phone with your laptop. On Windows, open the Bluetooth settings and make sure your laptop is discoverable when pairing. Once the devices are connected, open the Bluetooth file transfer option on your laptop and choose to receive files. Select the pictures on your phone, tap Share, and choose Bluetooth as the transfer method. Keep both devices nearby until the transfer finishes.
Use Local Wi-Fi File Transfer Applications
Wi-Fi file transfer applications offer a more convenient alternative when Bluetooth feels too slow. These tools allow your phone and laptop to exchange files through the same local network, often using a browser or a dedicated desktop application. Depending on the tool, you may only need to scan a QR code or enter a temporary address in your laptop’s browser.
After connecting both devices to the same Wi-Fi network, follow the application’s instructions to establish a connection. Select the photos you want to send and choose your laptop as the destination. This approach can be particularly useful when transferring multiple high-resolution images because Wi-Fi generally provides better speeds than Bluetooth. Just make sure you use a trusted application and avoid sharing files through unfamiliar public networks.
How to Transfer Photos Using Cloud Storage Services
Cloud storage is another practical way to transfer pictures between a phone and a laptop. Instead of connecting both devices directly, you upload your photos from your smartphone and access them later through your laptop. This method is especially convenient if you frequently switch between devices or want an additional copy of your pictures online.
Services such as Google Photos, Google Drive, OneDrive, and iCloud provide different ways to store and access images. The basic process is usually simple: upload the pictures using your phone, sign in to the same account on your laptop, and download the files you need. However, remember that cloud storage depends on your internet connection and available storage space. Uploading a large photo collection can take time, particularly if your internet speed is limited.
Transfer Photos Using Google Photos
Google Photos is a convenient option for Android and iPhone users who want to access their pictures from multiple devices. Install or open the application on your phone, sign in to your Google account, and enable backup if you want supported photos to upload automatically. You can also select individual pictures and upload them manually if you don’t want to back up your entire collection.
On your laptop, open Google Photos through a web browser and sign in using the same Google account. Your backed-up pictures should appear in your photo library. Select the images you want to save and use the download option. One important detail: downloading pictures from Google Photos may give you files in their backed-up or processed versions, depending on your settings and the available originals. Check the downloaded files if preserving the original quality and format is important to you.
Use Google Drive to Store and Download Pictures
Google Drive works slightly differently because it focuses on general file storage rather than photo management. You can upload selected images from your phone into a dedicated folder, then access that folder from your laptop. It’s a straightforward approach if you want to organize photos alongside documents, videos, and other files.
Open Google Drive on your phone, choose the upload option, and select the pictures you want to store. Once the upload finishes, open Google Drive on your laptop using the same account. Find the folder containing your pictures, select the files, and download them. This method is particularly useful when you want to transfer specific photo collections without enabling automatic photo backup.
You can also explore 10 Cloud Storage Apps That Keep Your Most Important Files Safe to find reliable ways to store, protect, and access your important files online.
How to Transfer Photos Using OneDrive or iCloud
If you already use Microsoft or Apple services, OneDrive and iCloud can make photo transfers much easier. Both platforms allow you to access pictures across multiple devices without manually connecting your phone to your laptop every time. They’re especially useful if you regularly work with photos and want them available on more than one device.
The main difference comes down to the ecosystem you’re using. OneDrive works across Android, iPhone, Windows, and macOS, while iCloud is particularly convenient for people who use multiple Apple devices. Both services offer automatic synchronization, but their storage limits and settings differ. Choosing the right one can save you time and reduce the effort involved in managing your photo collection.
Transfer Phone Photos to a Laptop Using OneDrive
OneDrive is a practical option if your laptop runs Windows and you already use a Microsoft account. You can install the OneDrive application on your Android phone or iPhone, sign in, and upload selected pictures to your cloud storage. On many devices, you can also enable camera backup to automatically upload new photos.
Once your pictures have been uploaded, open OneDrive on your laptop or access it through a web browser. Sign in with the same Microsoft account, navigate to the folder containing your images, and download the files you need. If OneDrive is installed on Windows, you may also be able to access synchronized files directly through File Explorer. Just remember that cloud synchronization doesn’t always mean a separate offline copy is stored on your laptop, so check the file availability settings.
Transfer iPhone Photos Using iCloud Photos
iCloud Photos is a convenient solution for transferring pictures from an iPhone to a MacBook or Windows laptop. When enabled, it automatically synchronizes your photo library with your iCloud account, allowing supported devices to access the same collection. You don’t need to manually select and send every new picture.
On your iPhone, open Settings, tap your Apple Account, navigate to iCloud, and select Photos. Enable Sync this iPhone to start syncing your photo library. On a MacBook, open the Photos app and make sure iCloud Photos is enabled under its settings. Windows users can install iCloud for Windows and enable the Photos feature to access their synchronized pictures. Keep in mind that iCloud storage is shared across services, so you may need additional storage if your photo library is particularly large.
How to Transfer Photos Using Quick Share
Quick Share is a useful wireless file-sharing feature for compatible Android devices and Windows laptops. It allows you to send pictures, videos, and other files without uploading them to cloud storage. This makes it a convenient choice when you want to transfer photos directly between nearby devices.
To get started, make sure Quick Share is available on your Android phone and Windows laptop. Enable Bluetooth and Wi-Fi on both devices, then open Quick Share on your phone. Select the pictures you want to send, tap the Share option, and choose Quick Share. Your laptop should appear as an available nearby device if everything is configured correctly. Select it and accept the incoming files on your laptop when prompted.
Make Your Laptop Discoverable
Before sending pictures, check the Quick Share visibility settings on your laptop. Your device needs to be discoverable to nearby devices, either temporarily or according to your preferred visibility option. You may also need to sign in or adjust the receiving permissions, depending on your Windows and Quick Share versions.
For better privacy, avoid leaving your laptop permanently visible to everyone nearby. Choose a visibility setting that allows your own devices or contacts to find it whenever possible. Once the transfer is complete, you can return the visibility setting to a more restricted option.
When Quick Share Is the Better Choice
Quick Share is particularly useful when you want to send multiple pictures without dealing with cables or cloud storage limits. For example, if you’ve just returned from a trip and want to move selected vacation photos to your Windows laptop, you can transfer them directly without first uploading everything to an online account.
However, compatibility still matters. Quick Share availability depends on your Android device, Windows version, and supported wireless hardware. If your laptop doesn’t appear, check that both devices have Bluetooth and Wi-Fi enabled, that the required application is installed, and that their sharing settings allow the connection.
How to Transfer Photos Without Losing Image Quality
One concern people often have when transferring pictures is whether the original image quality will remain intact. After all, there’s little point in backing up your favorite photos if they become blurry, compressed, or noticeably different from the originals. Fortunately, most direct file-transfer methods preserve the original files as long as you copy them without applying additional compression or conversion.
USB transfers, direct file sharing, and downloading original files from cloud storage are generally good options for maintaining image quality. However, some photo-sharing applications automatically compress images to reduce file sizes. If you’re transferring pictures for editing, printing, or long-term storage, pay attention to the file format, resolution, and download settings before starting.
Choose Original Quality When Uploading Photos
If you’re using Google Photos, OneDrive, or iCloud, check the backup and synchronization settings before uploading your pictures. Some services offer different storage or quality options, which can affect how your images are stored. For example, selecting a compressed backup option may reduce file sizes compared with storing original-quality files.
For important pictures, choose the original-quality option whenever available and make sure you download the original files rather than smaller previews. This is particularly important for high-resolution smartphone cameras, where details can make a noticeable difference when editing or printing images.
Avoid Sending Photos Through Compressed Messaging Apps
Messaging applications are convenient for sharing pictures, but they aren’t always ideal for transferring original-quality images. Some platforms automatically resize or compress photos to reduce data usage and make uploads faster. As a result, the downloaded image may have a smaller resolution or file size than the original.
If you need to send pictures through a messaging application, look for an option to share them as files or documents instead of regular photos. This can help preserve the original image, depending on the application’s supported file-sharing behavior. For larger collections, however, a USB connection or dedicated file-transfer service is usually more practical.
How to Organize Your Photos After Transferring Them
Transferring pictures to your laptop is only half the job. If you simply dump hundreds of images into one folder, finding a particular vacation photo or family picture later can become surprisingly frustrating. A little organization immediately after transferring your files can save you plenty of time in the future.
Start by creating a main folder specifically for your photo collection. You can organize it by year, month, event, or location depending on how you prefer to browse your memories. For example, separate folders for family gatherings, holidays, work projects, and screenshots can make everything easier to locate. The goal is to create a system that feels natural rather than turning photo management into another complicated task.
Create Folders Based on Dates and Events
A date-based folder structure is one of the easiest ways to organize a growing photo library. You can create folders for each year and use smaller folders for specific months or events. For example, a folder named 2026 Vacation or Family Gathering – October 2026 makes it easier to recognize the contents without opening every image.
You can also combine dates with short descriptions to make folder names more meaningful. This approach works particularly well if you frequently transfer pictures from different devices. Just try to use a consistent naming style so your collection doesn’t become a confusing mixture of unrelated folder names.
Rename Important Photos for Easier Searching
Most smartphones automatically assign generic filenames to pictures, such as IMG_1234 or DSC_5678. Although these names are perfectly fine for basic storage, they don’t tell you much about what each image contains. Renaming particularly important pictures can make searching through your collection much easier.
For example, you could rename a favorite picture to Birthday_Celebration_2026.jpg or Beach_Trip_Family.jpg. You don’t need to rename every single image, especially if you have thousands of them. Focus on important photographs, professional work, or images you expect to use regularly. Also, avoid changing file extensions manually because doing so can make some files difficult to open.
Common Problems When Transferring Phone Photos to a Laptop and How to Fix Them
Even though transferring photos is usually straightforward, things don’t always go as planned. Sometimes your laptop refuses to recognize your phone, the transfer gets stuck halfway, or certain pictures simply don’t appear. These problems can be annoying, especially when you’re trying to back up hundreds of important memories.
The good news is that most transfer issues have simple explanations and don’t require professional help. A loose cable, incorrect USB setting, outdated driver, or unstable wireless connection can easily interrupt the process. Before trying complicated solutions, check the basic connection settings and make sure both devices are ready to exchange files.
Your Laptop Doesn’t Recognize Your Phone
One of the most common problems happens when you connect your phone using a USB cable but nothing appears on your laptop. This doesn’t necessarily mean your phone or computer is broken. Sometimes the cable only supports charging, the USB port isn’t working properly, or your phone hasn’t granted permission to access its storage.
Start by unlocking your phone and checking the USB notification. If you’re using Android, select File Transfer instead of charging mode. For an iPhone, approve the Trust This Computer prompt if it appears. You can also try another USB port or cable to determine whether the connection is the problem. If Windows still doesn’t recognize your device, checking Device Manager for driver issues may help.
Photo Transfer Gets Stuck or Stops Unexpectedly
A transfer that suddenly stops can be frustrating, particularly when you’re copying a large collection. This may happen because of an unstable USB connection, insufficient laptop storage, a damaged file, or a temporary software issue. Wireless transfers can also fail when your phone and laptop lose their network connection during the process.
Try transferring smaller groups of photos instead of selecting everything at once. Check your laptop’s available storage and make sure your phone has enough battery to complete the operation. If the transfer repeatedly fails, restart both devices and try again. For wireless transfers, keep the devices close to your router or use a more stable connection.
Some Photos Are Missing After the Transfer
Sometimes the pictures you expect to see don’t appear in the destination folder. This can happen because certain images are stored in different directories, haven’t finished syncing to the cloud, or exist only as optimized previews on your phone.
On Android, check folders such as DCIM, Pictures, Screenshots, and Download. On an iPhone, verify whether the pictures are stored locally or need to be downloaded from iCloud before transferring them. If you’re using a cloud service, check its synchronization status and make sure you’re signed in to the correct account. It’s also worth searching your laptop for the original filenames before assuming the files have disappeared.
How to Keep Your Phone Photos Safe After Transferring Them
Once your pictures are stored on your laptop, you might feel tempted to delete the originals from your phone immediately. However, it’s better to take a few precautions first. A laptop can provide plenty of storage, but it isn’t immune to hardware failure, accidental deletion, malware, or unexpected system problems. Keeping only one copy of your favorite memories is a risk that’s easy to avoid.
A reliable photo backup strategy involves maintaining more than one copy of important files. You could keep your main collection on your laptop, create another copy on an external hard drive, and optionally use cloud storage for additional protection. That way, if something happens to one storage device, you still have another place to recover your pictures.
Create a Second Backup on an External Drive
An external HDD or SSD is a practical option for keeping an additional copy of your photo collection. Connect the drive to your laptop, create a dedicated backup folder, and copy your important pictures into it. External HDDs are generally suitable for storing large collections at a lower cost, while SSDs offer faster file access and better resistance to physical shocks during normal portable use.
You don’t necessarily need to back up every picture after every transfer. You can create a routine, such as updating your external backup whenever you add a new batch of photos. Just remember to disconnect the drive safely after copying files and store it somewhere away from potential physical damage.
Avoid Deleting Original Photos Too Early
Before removing pictures from your phone, open several transferred files on your laptop and confirm that they display correctly. Check a mixture of older and newer photos, including high-resolution images and pictures captured in different formats. If you’ve transferred an entire folder, compare the number of files on both devices to catch anything that might have been missed.
If possible, keep the original pictures on your phone until you’ve created a second backup. This extra step might seem unnecessary when everything appears to have transferred successfully, but it can save you from losing valuable memories because of one incomplete transfer.
Best Tips for Making Photo Transfers Faster and Easier
Transferring photos doesn’t have to become a repetitive chore every time your phone storage starts running low. With a few simple habits, you can make the entire process faster, more organized, and less likely to run into unexpected problems. The trick is to choose a transfer method that suits your devices and avoid unnecessary steps that slow everything down.
You should also consider how frequently you take pictures and how much storage they consume. Someone who takes a few photos every week probably doesn’t need an elaborate backup system. However, if you regularly capture high-resolution pictures or record videos, having a consistent transfer routine can make a noticeable difference. Here are some practical tips worth following.
Use a Good-Quality USB Cable
A reliable USB cable can make a significant difference when transferring large photo collections. Not every cable supports data transfer, even if it can charge your phone perfectly. Some inexpensive charging cables only provide power, which means your laptop may never recognize the connected device as a storage source.
Choose a cable that supports data transfer and is compatible with your phone and laptop. If your laptop has a suitable USB-C port, using a compatible USB-C cable may also reduce the need for adapters. Avoid damaged cables or loose connectors because an unstable connection can interrupt transfers and force you to start again.
Transfer Photos in Smaller Batches
Although selecting thousands of pictures at once might seem convenient, transferring everything in one operation isn’t always the best approach. Large transfers can take longer, consume more system resources, and become difficult to troubleshoot if something goes wrong halfway through.
Instead, divide your photo collection into smaller groups based on dates, folders, or events. For example, you could transfer pictures from one month at a time and check each batch before moving to the next. This makes it easier to identify missing files and keeps your destination folders organized from the beginning.
Keep Your Devices Updated
Software updates can improve compatibility, fix connection problems, and address bugs affecting file transfers. If your phone or laptop is running an outdated operating system, you may encounter unexpected issues when connecting devices or using wireless sharing features.
Check for available updates on both devices occasionally, particularly if a transfer method that previously worked suddenly stops functioning. You should also keep relevant applications, such as Quick Share, iCloud, and cloud storage clients, updated. However, avoid updating your devices in the middle of an important transfer because restarting may interrupt the process.
Choose the Right Transfer Method for Your Needs
Not every transfer method is suitable for every situation. USB connections are generally a dependable choice for large collections, while AirDrop and Quick Share are convenient for sending selected pictures between compatible devices. Cloud storage works well when you want your photos accessible from multiple locations without manually connecting your devices.
Think about what you’re trying to accomplish before choosing a method. If you’re backing up several gigabytes of pictures, a wired connection may be more practical than uploading everything online. On the other hand, if you only need to send five vacation photos to a laptop, wireless sharing can save you the trouble of finding a cable.
Which Photo Transfer Method Should You Choose?
With so many available options, choosing the right method can feel a little confusing. Fortunately, you don’t need to master every transfer technique. Understanding the strengths and limitations of each option is enough to help you make a sensible decision based on your devices and everyday needs.
For most people, a USB connection is a dependable starting point because it doesn’t require an internet connection or cloud subscription. However, wireless sharing and cloud services offer more flexibility when convenience matters more than having a direct physical connection. The best method is ultimately the one that works reliably with your devices and makes managing your pictures easier.
Best Method for Large Photo Collections
If you need to transfer hundreds or thousands of pictures, a USB cable is often the most practical option. It provides a direct connection between your phone and laptop, allowing you to copy files without waiting for them to upload to an online service. You can also organize the pictures into folders immediately after transferring them.
For Android users with Windows laptops, File Explorer provides a straightforward way to access supported phone storage. iPhone users can rely on the Windows Photos app, while MacBook users can use Photos or Image Capture. These built-in options are generally sufficient for ordinary photo backups.
Best Method for Quick Everyday Transfers
If you only need to send a handful of pictures, wireless options are usually more convenient. AirDrop is particularly useful for transferring images between Apple devices, while Quick Share offers a similar experience for compatible Android and Windows devices. You can send selected pictures without dealing with cables or manually browsing storage folders.
Cloud storage is another good option if you want automatic synchronization across multiple devices. However, remember that cloud services depend on available storage and internet speed. If your connection is slow, a direct wireless transfer may be quicker.
Conclusion
Transferring photos from your phone to a laptop doesn’t have to be complicated. Whether you’re using Android or an iPhone, there are several convenient ways to move your pictures, including USB cables, wireless sharing, and cloud storage services. Each method has its own advantages, so choosing one that matches your devices and transfer needs can make the process much easier.
For large photo collections, a USB connection is often a reliable choice, while AirDrop, Quick Share, and other wireless options are excellent for smaller transfers. Cloud services such as Google Photos, OneDrive, and iCloud are also worth considering if you want your pictures accessible across multiple devices. Whatever method you choose, remember to check your transferred files and create an additional backup before deleting the originals from your phone.
Ultimately, the best approach is to make photo transfers part of your regular digital routine. A little organization and a consistent backup habit can help keep your smartphone storage under control while protecting the memories you don’t want to lose.
FAQs
1. What Is the Easiest Way to Transfer Photos from a Phone to a Laptop?
Using a USB cable is one of the easiest methods, especially when transferring large numbers of pictures. Connect your phone, enable the appropriate file-transfer setting, and copy the photos to your laptop. If you prefer a wireless option, AirDrop and Quick Share are convenient alternatives for compatible devices.
2. Can I Transfer Photos from My Phone to a Laptop Without a USB Cable?
Yes. You can use wireless sharing applications, Bluetooth, or cloud storage services such as Google Photos, OneDrive, and iCloud. AirDrop also works well between compatible Apple devices, while Quick Share supports compatible Android phones and Windows laptops. Most wireless methods require Wi-Fi, Bluetooth, or an internet connection, depending on the service.
3. Will Transferring Photos Reduce Their Original Quality?
Not necessarily. Direct USB transfers generally preserve the original image files without changing their resolution or quality. However, some messaging applications and cloud backup services may compress pictures depending on their settings. If image quality matters, choose original-quality backup options and avoid sending pictures through compressed sharing modes.
4. Why Doesn’t My Laptop Recognize My Phone When Connected Through USB?
This problem can happen because of a faulty cable, an incompatible USB port, incorrect connection settings, or missing device drivers. For Android phones, make sure you’ve selected File Transfer mode instead of charging only. For iPhones, unlock the device and approve the Trust This Computer prompt. Trying another cable or USB port can also help identify the problem.
5. Should I Delete Photos from My Phone After Transferring Them to a Laptop?
You can, but it’s better to verify that all pictures have transferred successfully first. Open several files on your laptop and make sure they aren’t corrupted or incomplete. Ideally, create another backup on an external HDD, SSD, or cloud storage service before deleting the originals. This gives you an additional layer of protection if your laptop experiences storage failure or accidental data loss.